![]()
This tutorial shows how to enhance the default GNOME’s built-in screenshot tool with on-screen editing (annotation), OCR (Optical Character Recognition), and other basic features in Ubuntu 26.04 LTS.
GNOME, the default Ubuntu desktop, introduced built-in screenshot/screencast tool since version 42. It’s great but lacks features such as changing saving directory and image file format.

Gnome’s built-in screenshot tool with annotation support
Thankfully, Alexander Vanhee, a member of GNOME Foundation, make an extension few months ago that enhances the built-in screenshot tool with long requested features before GNOME supports them officially.
It’s Gradia Capture, an extension that adds on-screen annotating support when you trying to capture a selection of screen area. As you see in the screenshot above, the annotation supports free-hand tool, rectangle, text, highlighter, arrow, and number stamp tools with different colors, undo, reset support.
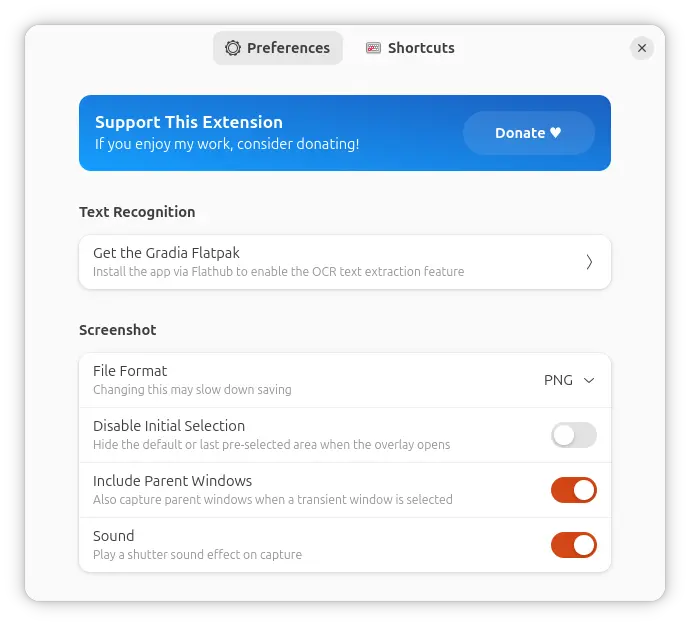
Besides annotation support, it also allows you to change the file format between PNG, WebP, and AVIF, configure whether to capture parent windows when a transient window (e.g., Nautilus context menu) is selected, play sound or not.
And, it adds keyboard shortcuts support for actions, such as switch selection mode, copy to clipboard, and toggle pointer visibility, as well as annotation tools, and system keybindings.
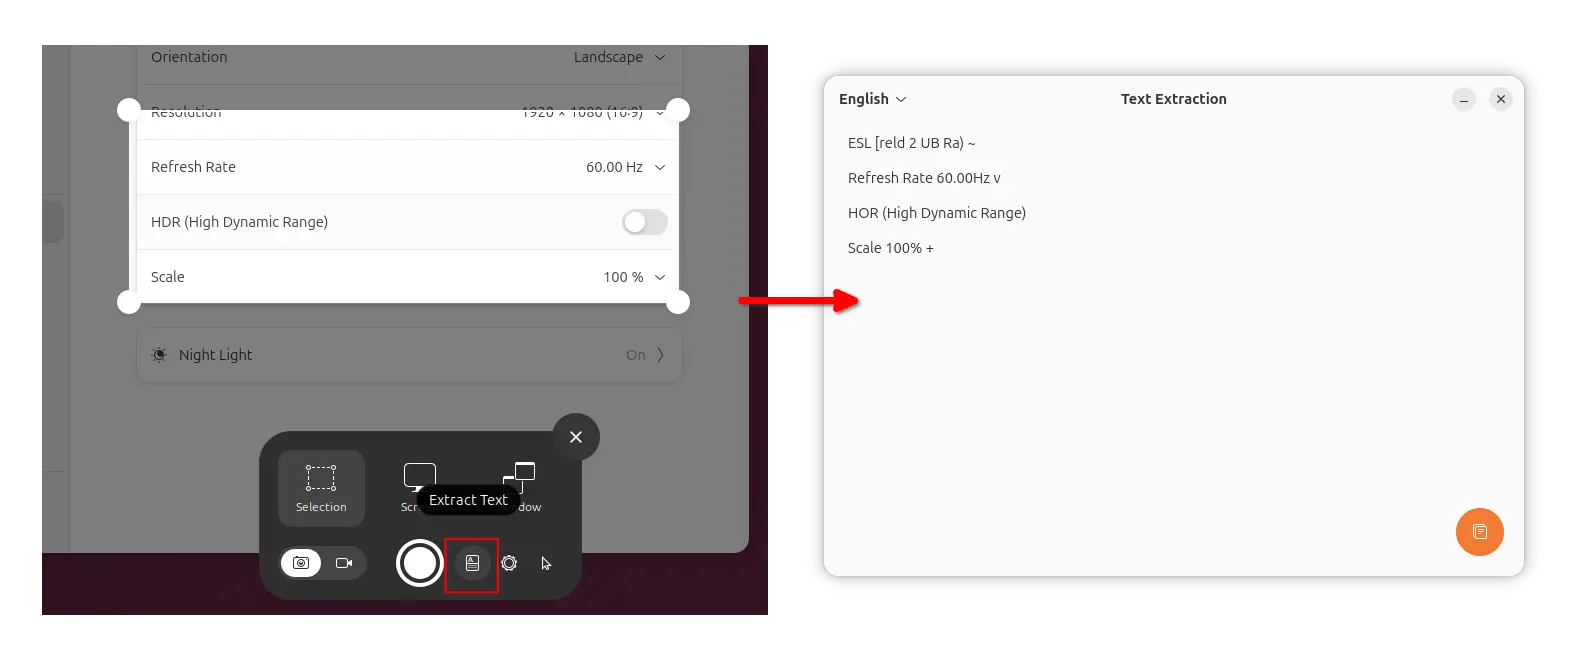
As you see in the screenshot, after installed the popular Gradia annotator tool, it can also extract text from your selected screen area using the installed OCR models.
Other features include:
- Save to custom location (Ctrl+S to open save as dialog).
- Support “disable initial selection” when you trigger the screenshot tool.
- Button to open screenshot in Gradia for further editing support.
- Button to open screenshot folder.
As a new project, it will probably add more new features, such as blur tool to hide sensitive data. And, you can request features by going to the project page.
Install Gradia Capture to Enhance the GNOME Screenshot Tool
The extension so far supports GNOME 49 and 50. Meaning that you can install it in Ubuntu 26.04 and 25.10, Fedora 43/44 Workstation, and Arch etc distributions. And, someone reported it also works in GNOME 48.
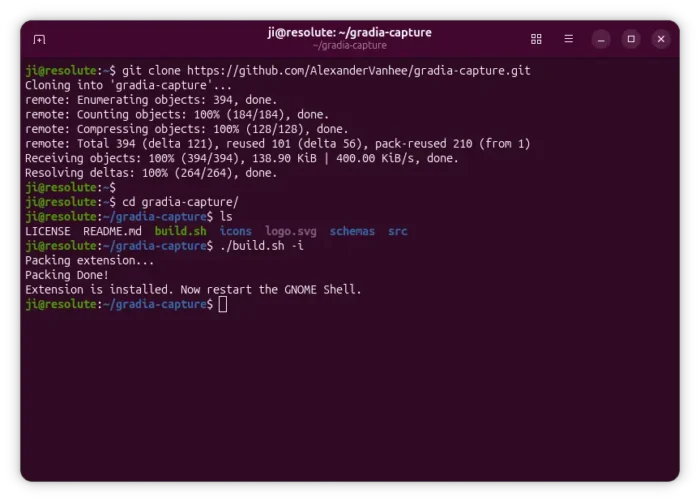
The extension so far is not made into extensions.gnome.org, you can install it via the 3 commands below.
First, press Ctrl+Alt+T on keyboard to open terminal. When it opens, run command to clone the source:
git clone https://github.com/AlexanderVanhee/gradia-capture.git
Run sudo apt install git to install git if you don’t have it.
Next, navigate to the source folder:
cd gradia-capture
Finally, run the script to install the extension to local folder (.local/share/gnome-shell/extensions):
./build.sh -i
To apply changes, log out and back in. And, enable the extension in either “GNOME Extensions” or “Extension Manager” app, which are available in GNOME Software or App Center (filter by Debian package).
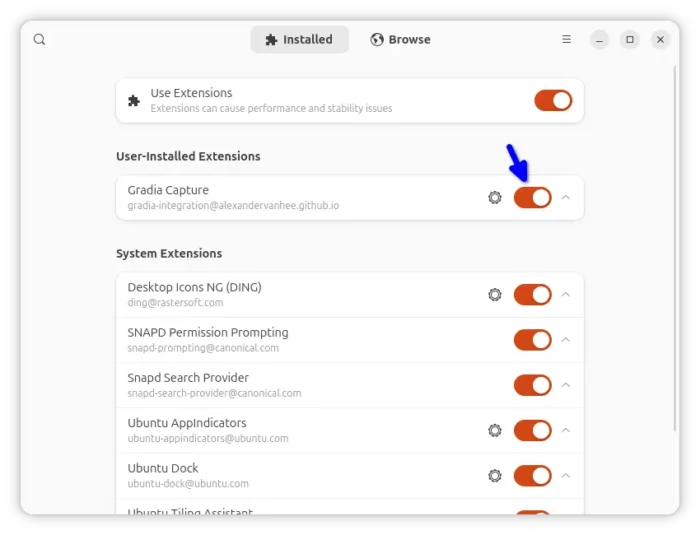
Enable the extension via Extension Manager
Install Gradia for ORC support
As mentioned, the extension requires Gradia for the optical character recognition support.
Fedora with third-party repository enabled can easily search & install it from GNOME Software. While, Ubuntu and Ubuntu may run the 2 commands below one by one to get it:
- First, open terminal (Ctrl+Alt+T) and run command to enable Flatpak support:
sudo apt install flatpak
- Next, install Gradia flatpak package via command:
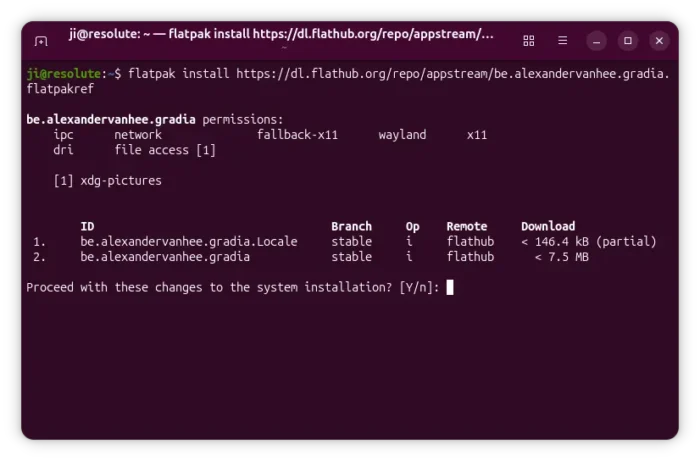
flatpak install https://dl.flathub.org/repo/appstream/be.alexandervanhee.gradia.flatpakref
Finally, press PrintScreen key or use the top-right quick settings menu option to trigger the screenshot tool, and you’ll see the new ORC button when selecting a rectangle area.
source https://ubuntuhandbook.org/index.php/2026/05/screenshot-annotation-ocr-ubuntu/


Tidak ada komentar:
Posting Komentar